Tuesday, April 7, 2009

Decorating on a Dime: Country Cottage Design


Hello there, hope you enjoy these next before and after shots of one of my proudest jobs!

I got a call from Lona and she was a little nervous about some choices she had to make to get what she wanted.... she called the right person, and I am sooooo glad she did. This project was so rewarding in soooo many ways. To see my clients faces light up with joy when they finally see the end project was the most rewarding.

Let me know what you think of this make-over.

It didn't take long before I knew what design I was going for once I seen all of Lona's previous purchases she hasn't used yet. Once you figure out your design, the decisions are so much easier on what to do with the room. Enjoy!

BEFORE: China Hutch


Sorry , it's the best pic I got, when I took before pictures of there house, wasn't sure we were going to refinish the hutch at that time. Sure glad we did.

AFTER: China Hutch


I had a vision and it was everything I expected. I had shown pictures in my blog @ an earlier date when I was working on refinishing this hutch with my clients.
I taught them how to scuff up paint, take chains to put some wear and tear on the project, they of course did the painting, and then I came back to show them how to antique it with sand paper and staining over the paint. I also bought some carvings and had them attach those with glue before painting, brought the look of the hutch up to date.
Isn't it a Great Focal Piece now!

AFTER: China Hutch


This china hutch is now a huge focal point in room.
How did we chose green for the cabinet you ask? WEll, I went shopping keeping in mind all the stuff Lona had to use. Leather furniture, Red plaid chair, and couch you see here, pictures that have red barns, and green grass, (hint), I seen lots of country decor and a bowl of green apples.
Well I came across these pillows, furthest to the left, had all these colors and fit the Country Cottage look I wanted. I pitched the idea to Lona, she loved it. Little hesitant on red walls, but, she trusted me and as you can see it worked out beautifully!
So we went shopping together and found this table and mirror the perfect green apple color and she bought it, perfect so we have that by the door, notice, pullin color around room is key. The pillows have a hint of green, the pictures on wall, apples on table, plants, and then the hutch in other corner.

BEFORE: Family room/kitchen


Notice: No curtains, square table, square windows, square picture no drama, I love drama. hehe.....I like showing off height of room, I don't think that is being done here when everything is hung the same level. WE need to draw the eye up. Notice in next picture how red is used in little things around room. She had this beautiful wing back chair in a plaid red. That helped me decide her design also. Country Cottage look. She lives on the lake, works perfect!

AFTER: Family room/kitchen


Take notice to the drapes, my client already had beautiful pleated shades on windows for privacy. No need to spend money on a bunch of drapes if all the purpose they are doing is for decoration. So we went with the small rods on each end of window, called (dummy rods). Nice accent piece , very decorative and no need for a curtain rod across whole window if your not going to use it. Curtain rod color choice was made to match the iron on her bar stools.
Lona needed a clock in the room, I wanted to show the height of the room by putting this beautiful clock she found up high and some of her favorite pictures underneath. Hard to tell in this picture but, the clock has some hint of green on it which is another color we chose for a highlight color.

BEFORE: looking from den to family room

She told me her house felt unfinished and cold. Look on to see what color can do for a room

AFTER: Looking from Den to Family Room


When rooms are open to each other like so, we want to create flow from one room to another. I got the inspiration of color from my client wanting to go with red drapes, that made my choice for wall color and I wanted to pull the red into both of the rooms without it looking to dark. Using accent walls are the best way to do that. The other walls are a cream color and took that a couple shades lighter to the ceiling. Once I knew she wanted red, I went shopping on my own to get ideas for the area, she also had dug out some pictures she was wanting to use and didn't know where to put them, she told me what color furniture she was going to buy.
I told her she was to get matching carpet in den to match the family room and she did just that. That made the rooms feel like a whole and not so chopped up.

BEFORE:


From cold to cozy, what do you think?

AFTER: Den


Need I say more!

BEFORE: another angle of den


Take away the old window treatments, and bring in some warmth with paint, and look what you get. Look at the after picture!

AFTER: another angle in Den


amazing how color on walls shows off the beauty of the tv unit. My client added the plants and vase with twigs, gives great depth to the room and putting the light colored vase against darker wall was genius of her.

BEFORE: Den


watch how moving furniture, just looks so more inviting! Better for conversation area also.
Putting a valance on window softens harsh lines in room.

AFTER:


Changing the angle of furniture works a lot better for viewing of tv, and it softens corners, not making the small room look so square. The pictures on the wall are the same she had before. She is still looking for the right pillows of her choice. Brought in more lighting, that makes a big difference in this room. Like I have said before, Lighting should be established in a triangle covering 3 angles of the room. Also light coming up , light goin down and eye level.

BEFORE:


Look at the angles of the room and the height of room, color would enhance that. Look at the next picture and see how color does the trick.

AFTER:


I liked using the accent color to show off the different angles of this room.

Thursday, March 12, 2009

Newspaper Article, I made the Front Page!

There was Joanie Siewert, pouring over hundreds of silk flowers on display at the department store trying to find the "perfect" arrangement for her kitchen. She had been there a long time. Jean Kirst, of Markesan enters the aisle grabs a few of these, some of those, a couple of that and walks away with a beautiful arrangement to die for.
"Stop right there, how'd you do that?" Siewert called.
Kirst, with an eye for colors, and artsy-craftsy background and a knack for visualizing a room's possibilities, explained that she was considering starting a business to help people with home decorating.
"I'll be your first customer!" Siewert offered.
And so it was in the fall of 2004, Jean Kirst started "Decorating on a Dime" a low-cost decorating service that helps people work with what they have or finds low cost solutions for living with or letting go of clutter.
Whether it's organizing your stuff, turning trash into treasures or taking on the challenge of making your home presentable for sale, Kirst can provide everything from consultation and color coordination, to customized handmade accents.
"I'm really striving to work with in people's mean and with existing things. I want to make your home more comfortable and relaxing. You should like what you come home to after a hard day's work," Kirst said.
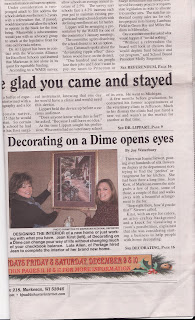
Joanie Siewert's plain, white-walled entry way was transformed with a deep, rich color that she would've never considered. The room is now a spectacular showplace for her antiques, plants and special art work.
The chance meeting at the department store, turned into a lasting friendship.
Over in Portage, Lola Allen hired Kirst to make her newly constructed home match her furniture and wall hangings.
"People come into my house now and they comment on how much they like the colors and how beautiful my home is," Allen said.
Another customer Dustylee Gray, of Poynette agrees.
"Jean has a way of looking outside the box when it comes to decorating. What a person may initially scoff at in concept, translates absolutely beautifully in reality," she said.
Kirst says the success of both her craft business (Krafts by Kirst) and her new decorating service she attributes to her family.
"They are really proud of me and very supportive, I couldn't do it without them," she said.

That was in 2004, now my business has expanded I have to hire painters to come in, I no longer do the painting, I work with several clients at once, I shop for furniture, pick out flooring, work with a window treatment company, on top of decluttering , organizing and just simply redecorating. I even had to purchase a van for halling furniture and all my goodies I buy for clients, sporting my Decorating on a Dime logo on it. My goal is to be on TV some day, may be a high goal, but it's my goal...... lol

Newspaper Article, 2nd part of story. The Back page of Paper


This is a picture of Sammi Jo and I at my workspace were all my creations began and finished.

Newspaper Article


This was a hint to people that I was going to be in Kingston at a later date. I had made that flower arrangement and many more to show at the lecture.

Newspaper article on my Lecture on Decorating


My whole family assisted me on this project, I took curtains, plants, things I made , pictures , lamps, pillows, to show people how to pull a room together and told them how to use what they have at home. Great turnout!

Article in Newspaper, of The Markesan Regional Reporter Office Redo

This was the Open House Party they threw for me after I got done with redoing the office makeover.

BEFORE: North side of MRReporter office


Take notice the furnace placement, the building is old and cold, so bringing in carpet , warm paint choice made all the difference in the world, take a look.
Nothing in this project was bought brand new other than office supplies and organizational supplies. The desk they work on now, which is another pic, is a long table we found in the back room, I sanded it, put a couple of coats of polyurethane on it and it works perfect. Most cost of this project was in my labor.

AFTER: North side of office of MRReporter


I had furnace guy come in and move furnace down where it should be, fixed holes and repatched walls, gave them a mirror and coat hanger,, organize, delutter and you get much more workable space

BEFORE: the side view


change the layout, use space wisely and take a look at after

AFTER: Markesan Regional Reporter Office


declutter and organize according to how they work and they are happy clients

BEFORE: The Markesan Regional Reporter Office


This is the view I had when first walking in.

AFTER: The Markesan Regional Reporter Office

I had took this color on walls from the sign on there front window. The sign I made and painted for them to resemble the front page of there Newspaper with the redline underneath the title. The pictures I hung are front pages through the years they had published. I shifted the desk to the right of the room, making it more welcome and easier for the employees to access to the back where they work also. I talked to owner of building and recommended they put in carpeting, this building is old and cold. lol He happen to have some he wasn't using, I called an installer and it was done. I painted the trim around room , decluttered , organized office space and went to an old building they had with all paper press antiques. I rummaged through them and brought some old stamps, paper cutters, ink cartridges and used them for displaying on front shelves. Great conversation pieces for clients to enjoy when they come in.

My first business Card


That picture on the card is actually my living room. Take notice my e-mail address has changed since, 2004. It is now decoratingonadime@charter.net

BEFORE: Hallway


This Sammi Jo starting the project, always start with the ceiling. I had the kids on ladders, it was an interesting project cutting lines between the two colors I used on these walls. This hallway was so boring I couldn't stand it. It seemed like an unfinished room. WEll it doesn't now! Look at the after picture.

AFTER: Hallway


I liked using two colors in this hallway to show how tall of a space I have. I found that metal scrolling at a flea market, for a great price, love how it draws the eye up. I took the ivory color on side walls, and ceiling.. looks great!

BEFORE: Daycare in a Garage


This is an actual garage turned into a daycare, what a great space! The garage door goes up on good weather days, they have a huge screen going across the entryway to keep children in. She wanted me to declutter, organize, update new color choices and rearange furniture. I gave her the idea of having her husband build a changing station, with a diaper changing table to her heighth , no more bending that many times in a day. and I told him how to make little cubbies for each childs diaper bags or back packs. He did just so and they love it. You see that table runner on her table, that is what I decorated around, she loved all colors in it and I ran with that, changed window treatments to bring in more light, and show more of her great view in the country. Painted the garage door the color of walls so the door wasn't a big eyesore. Changed up metal brackets to match all other hardware in room, and tadaaaaaa, paint , new changing station/storage, valences , futon cover and its all done..take a look at the after, what do ya think?

AFTER: Garage


my picture looks dark, but, by no way is it dark in this fine place. It is big airy and very relaxing for my client and all her little children she takes care of. On the side of fireplace is pictures I left for her to hang up and the one on fireplace she was going to also. I don't do all the work, to cut costs, I give instruction and they do what they can.

water fountain, by rock pond


This is by the gate by the pool, remember this was in 2004, things have really changed since. This pond and fountain was my first and on to bigger and better things this year!
Plants I planted for tall background agains fence are bee balm, rudebekia, coneflower, lillies, daisies, just love them! Brings me lots of hummingbirds!

Tree trunk works wonders for plant stand


That tree trunk we had just got from a tree in the back yard that was causing havock with the pool, the tree had made too many walnut dropping in there and the squirrels were trying to hide there nuts on top side of railing around pool, and the squirrels would fall in, try to get out and rip our liner, some would drown, but, it works great here! Making something good out of a bad situation is what I am all about. lol
I found that old birdhouse in garage when we bought the house, love it!

Back entry where I and Sammi Jo were standing in Newspaper Article


my Little mexican guy resembles my father, taking a siesta. I made that birdhouse out of barn board from which I and my family had gone and torn off of and old demoloshed barn. I made a lot of those and people wondered why they cost so much if it is old used barn board, heck, I should of tooken them on the calls when people would call me and say, "Hey Jean, if you want the wood, come and denail it, load it , cut it, haul it", lol. I got old wooden box crates on deck with lots of different shape terra cotta pots, and antique tools and oil cans.

Pictures of people going through my Garden on the Garden Walk


It was a huge compliment that people were taking family pictures through the whole time in my garden.

This was July of 2004, when our garden was chose to be in a garden walk where they pick like 6 houses from Markesan and people pay to come see your garden, it was a neat experience, I got lots of comments,which inspired me to do more, such as in the background to the left of the playhouse is old window frames I hung on posts for morning glories to climb up instead of the common lattice. I use an old high chair cutting a hole in the seat big enough for a pot to go in and hang that on a wall also. I used an old odd shaped tree trunk to put pots on in different heights in garden, I have an old water pump with a stone pot beneath as a bird feeder, which is frequently used, I use old wooden boxes for puttin different levels on deck, and antiques inside mixed in with plants to draw interest. I decorate this backyard as an outside extension of the house.
The memory garden they are speaking of is to the left and right of stairs, I had grown different plants or shrubs in memory of my father(Joe), my brother (Jim) my sister (Judy) my other brother (John) and my nephew ( Jason). It's my way of celebrating there life as time goes on. I don't like going to cemetary's so I cherish them this way.

Newspaper articles of Decorating on a Dime


Monday, March 9, 2009

Before: A storage room, slash years ago a chicken coop!


Ok, this is on our pool deck, looks kinda of blah, wouldn't ya say? I have been wondering what to do with this boring site of the pool. There is this little room attached to the car part of the garage that used to be an ole chicken coop. Look at little door to the right of the big door. A Chicken Door! lol.... We have been using this room just to store garden supplies and pool supplies in since we bought house.
One day just lookin for another project to do, I said, "Hey Rusty", oh, he tends to run when I say those words...lol. "What's up now, he says", I just thought of something to do today, that storage room we do nothin in can be used as a snack bar for the pool, all we have to do is get the saw zaw out, cut out the windows, you have that old countertop I can use, I have posts, lets do it today", lol.... Rusty was gone in a flash, for some reason the car had to be filled with gas, he wanted to get the mail,,,,lol....... " Sounds like a great idea Jean", but when and how long will it take.. " well lets find out, I am starting today" .
Rusty left to get mail and etc. probably just driving around, lol, by the time he gets back, I had the windows out and the saw zaw out and the demolition begins.. he couldn't believe it when he came back...the most important thing is: He loves it now! We still have some work to do to finish things up, but, it is very useable now! We love it! Look at the After and let me know what you think!

After: A snack bar by pool. Most popular place now!


Take notice the center post, I picked up these old porch posts on side of road on garbage bulk days, they were Free, my favorite finds. lol (remember Decorating on a Dime) Look on each side of opening we put the half posts I found on the sides to draw interest and I think it added that extra touch it needed. I found some old cast iron shelf supports for underneath the bar, I found these in basement when we bought the house. The bar top was found from my husband, it was a second, meaning it was scratched or dinged up, so he got that for me and I sanded it, and put a heavy duty polyurethane that they use on boats on top, 3 layers to be exact.... Stinky stuff I tell ya.
For seating, I had been collecting milk cans, yes old rusty milk cans, probably paid next to nothing for them, went and bought some stool cushions and walllla, seats that can handle wet swimsuits and spills taboot...lol The bench you see in front was givin to me years ago, used it as a coffee table at one point if I recall, then was stored for years, well, look how nice it works here. lol
On the floor I put and indoor outdoor carpet, made just for outside wear and tear, it can handle drink spills and all. As far as Decorating walls, we brought in some old school memorabilia from Rusty, Chad and I and Sammi Jo's college softball stuff. We used Sammi Jo's college discount on Beer pitchers( we of course use for soda) ;) that sport her college name. Very cool! Plus some drinking signs we found at a clearance store that match our liking.
We have a refrigerator in the room for soda ;) and storage for food to keep critters out.
This has become the most popular place to hang out and play cards or just visit if you don't feel like sunbathing or swimming.
We have to replace deck in front of snack bar this year, that should be a fun project, I am trying to come up with something unique other than just deck boards, maybe I will paint a design on the deck or use some different materials.
I am putting up an awning for that extra beachy feel and hopefully find some old shutters for shutting up at night or on bad weather... I will post more pics when I get more of this project done..Isn't it cool? Love it!

Friday, January 16, 2009

I did this condo in the Rustic Style


I took the rust color on those to upper blocks, we went shopping and bought canoe, and I requested she bring in some plants and an armoir on right side of fireplace. On patio door, I picked out sliding panels, they were faux leather look in several shades of brown. Keep in mind, when I am done with a client the room isn't completely finished at the time of my pics, I have several clients going at once, I order things for them and stuff comes in different times and sometimes I don't get the final picture. But trust me, I don't leave until the client is happy and I feel good about what I have done..

Rustic Style condo take 2, notice layout of both condo's are the same, just different styles


when I got to this condo, it also had all white walls, as you can see, they love the lodge look. I helped them pick out window treatments also. Went shopping and found a great store to add some finishing touches to this beautiful condo. We finished the upstairs with some warm colors in each room also.

Another view of the Modern Style condo


Here you can see I put the blue from the couch on that back wall to pull that color around this big open room, it unites both areas then. The stainless steel refrigerator, gave me the metal of choice for all hardware through that floor. The dark dining room table which is a cafe table pulls the black from the living room.

After


The color I chose, is a slate gray on those back walls, to show dimension I put black above the mirrors, the wall to the right is black, yes black! Took some convincing, but wow, did it look great with that blue couch. Later after this picture was taken I had bought two frosted glass crudenzas, (dark brown in color, with stainless steal hardware) to put underneath each mirror, very sharp lookin. I used different shades of gray in kitchen and hallway that goes up the stairs to show dimension in the room also.. Her rug in the middle of the room had circles in it of different colors, blue, black , brown, and a very deep purple, so we popped a leather chair in the room also. The other colors in rug were brought through the room with vases and plants... another happy client!

Brand New Condominium I did last year in Modern Style, BEFORE


I love workin with a clean slate, this was fun, I picked out paint colors for all rooms in condo, picked out all window treatments also on both floors, bought those mirrors @ an incredible price, I shop for many clients at once, finding great deals for each client. These were $200.oo mirrors I got for $25.oo a piece, patience and lots of shopping time, but, it always pays off. My client had bought this furniture before I got there and wanted me to work my magic with it... how fun is that...

This is a lot of work, but, so worth it in the end. Can't wait to show you the results. This client started out with all white walls.. I accented as you can see with a green apple color, modern design, leather furniture, carpeting, new curtains, and this is where Decorating on a Dime comes in, I had them go in the basement and closets and show me things they had bought but did not use cuz they didn't know where to put the item, they were amazed how much new stuff they didn't have to buy, I was able to use a lot of stuff, they had in the closet and basement, the house is finished with there style....not mine. That is the way I like it... I want your house to be all about you!

Bottom of Hutch


This has glass doors on top, just beautiful!

This is and old hutch I showed a client how to antique


This started out the very glossy dark brown, I had them sand it , then we banged it with some chains to make it look older, I added that decorative piece in the center bottom and had them paint over it with same color, then scuff up paint then stain over the whole piece, it looks georgous. I will try to get a finished pic soon.

Curtains

I have a lot of people asking about what length to go with curtains. I love to go as long as I can with a curtain, with certain styles, you can even puddle the curtain on the floor. Years ago, you would of never heard of that. But, now you do, it is very classy with modern styles... curtains, come in mostly 84" long or 93" long, I like to make the eye travel as far up as we can go and all the way to the floor with whatever length you chose. It really shows the height of the room. Some people tend to decorate all eye level, I don't, with all these big houses being built these days, we must think big. Take a ruler from the floor up to 93" or whatever size you chose and mark there and that is how high your curtain rod should go. Hope this helped.

Wednesday, January 14, 2009

What color should I paint my room?

Well let's see, lots of things to consider before chosing paint colors. What's on the floor, what color are your big ticket items, such as sofa, chairs, curtains? When I chose a paint color for a client I make sure the color I put on the wall compliments all the big ticket items. I like to make them stand out in the room, especially because that is where you spent most of the money.

Hanging Pictures and what size to use in what space

I recently had questions on hanging pictures. I look at the space between ceiling and the sofa, or table whatever you are hanging the picture above, and I center the picture between the two. Now, people have a tendency to use too small of pictures in rooms, look @ the space I mentioned that you have room for, the bigger the picture, the bigger the area looks, or, hang lots of pictures, even throw in a mirror in the collection, to make a unit, remembering , when hanging multiple pictures, hang them 3 finger widths apart, when a person decides to hang pictures to far apart, it no longer looks like a unit, the eye travels from one thing then to another, therefore not looking like a unit.. Another thing to remember, stand back and take a look at the space you are trying to fill. Is it more wide than tall, or more tall than wide, use wide pictures in wide areas, don't put tall pictures in wide areas.